Building a Site With Hugo

As I mentioned in a previous post, this website is built with Hugo and deploys to Cloudflare Pages. In this post, I will show you how to create a Hugo site and automatically deploy it to Cloudflare Pages from start to finish.
Mac Setup
The first step is to download all of the necessary software onto your laptop. In this guide, I’m going to describe how to set this up on an Apple Mac laptop. First, we will install a package manager called Homebrew. To install Homebrew, open the Terminal app, which can be found under Applications > Utilities > Terminal. In the terminal, install Homebrew by running:
1/bin/bash -c "$(curl -fsSL https://raw.githubusercontent.com/Homebrew/install/HEAD/install.sh)"
Next, add the Homebrew path to the default path so that we can install other packages. The default shell on a Mac is zsh, that’s why we’re writing to ~/.zshrc below.
1echo "export PATH=/opt/homebrew/bin:\$PATH" >> ~/.zshrc
2source ~/.zshrc
Install Hugo:
1brew install hugo
Install the git command-line interface (CLI):
1brew install git
Install the go language:
1brew install go
Hugo pages are written using Markdown. When I wrote my first blog post, I used a command-line editor called vi, which is unusable for non-technical people. I’m now using Visual Studio Code, which you can download for free from: https://code.visualstudio.com/.
GitHub Setup
Create a GitHub account. The signup process is simple. Once I created my account, I set up two-factor authentication (2FA) using Okta Verify, but you can use many other 2FA apps like Google Authenticator. I also downloaded the GitHub recovery codes and stored them in a safe place in case I get locked out.
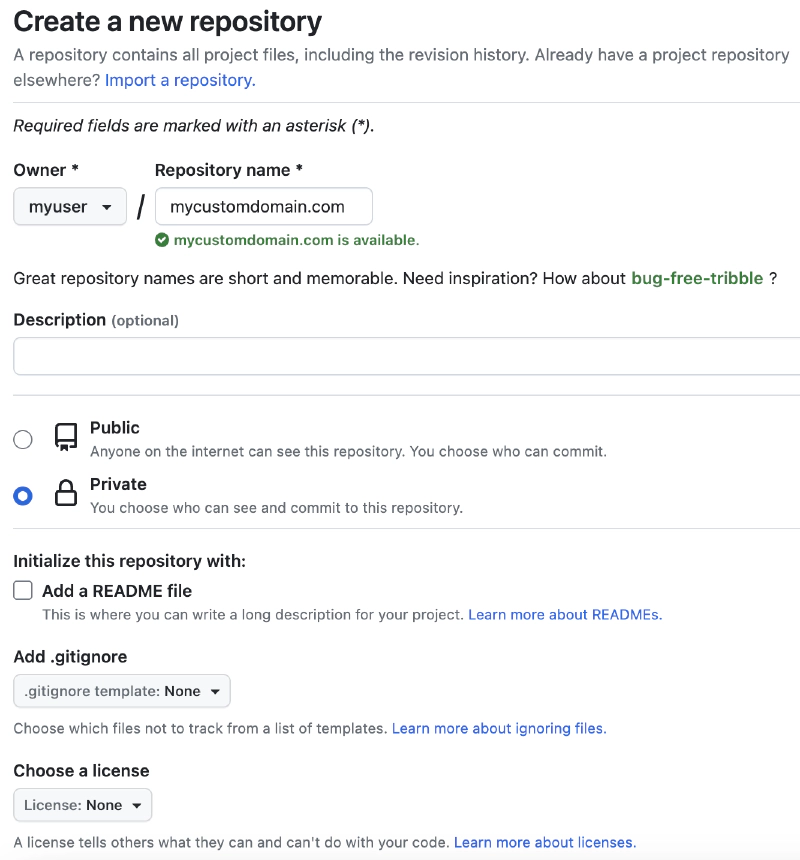
After your Github account is set up, create a repository for your website. This is where all of your website content will go. Click on Repositories > New. This will take you to: https://github.com/new/. Select your account as the owner and give your repository a name. A good name is the domain of your website, like mycustomdomain.com. Once Github confirms that the repository name is available, you will be given the option of making the repository public or private. Select private.
Next, set up SSH keys so that you can interact with GitHub from the command line. First, generate SSH keys:
1ssh-keygen -t ed25519 -C "[email protected]"
2
3> Enter a file in which to save the key (/Users/myuser/.ssh/id_ed25519: [Press enter]
4> Enter passphrase (empty for no passphrase): [Press enter]
5> Enter same passphrase again: [Press enter]
6
7touch ~/.ssh/config
Put the following text into your ~/.ssh/config file:
1Host github.com
2  AddKeysToAgent yes
3  UseKeychain yes
4  IdentityFile ~/.ssh/id_ed25519
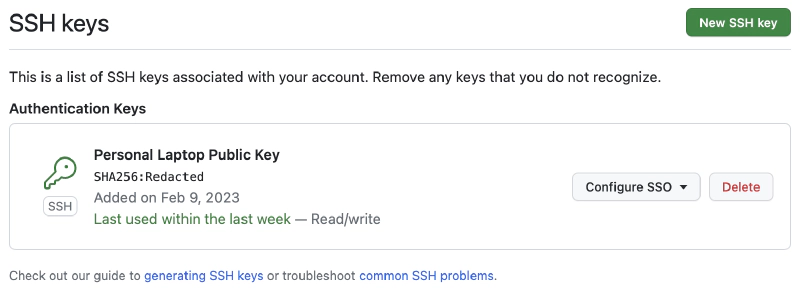
Then add the SSH keys to your account. On the GitHub website, go to Settings > SSH and GPG keys. Under SSH Keys, click on New SSH key, which will take you to: https://github.com/settings/ssh/new. Enter a title for your SSH key, like Personal Laptop, and paste your SSH public key. Run the following command to copy your SSH public key to the clipboard:
1pbcopy < ~/.ssh/id_ed25519.pub
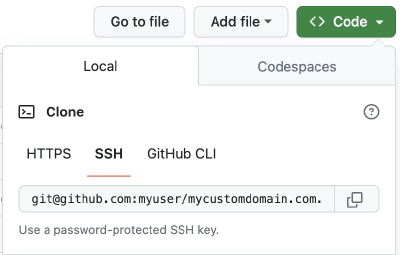
Now let’s download the repository onto your laptop. Go to your repository on the GitHub website. The URL to the repository will look something like github.com/username/repositoryname. From there, click on the Code button, under Clone select SSH, and copy the text.
In the terminal, run:
1git clone [email protected]/username/repositoryname.git ~/blog
This will create an empty directory under ~/blog from your repository, which is also empty.
Finally, edit the ~/.gitconfig file so that when we push changes to the blog, our name is associated. The ~/.gitconfig file should look like this:
1# This is Git's per-user configuration file.
2[user]
3# Please adapt and uncomment the following lines:
4name = My Name
5email = [email protected]
Create a New Hugo Site
To create a new Hugo site, run:
1cd ~/
2hugo new site blog --force
This will bootstrap all of the directories and files that you need for a new Hugo site under ~/blog.
Installing a Hugo Theme
You can find available themes here: Hugo Themes. Once you find one that you like, add it to your site by adding the theme as a Hugo module. Here’s an example of how to add the hugo-clarity theme to your Hugo site.
1cd ~/blog
2hugo mod init github.com/username/repositoryname
3hugo mod get github.com/chipzoller/hugo-clarity
Then add to the Hugo config file, hugo.toml:
1theme = "github.com/chipzoller/hugo-clarity"
To get updates to the theme, run:
1cd ~/blog
2hugo mod get -u ./...
Hugo Configuration
There are a lot of configuration options for Hugo. These are stored in the hugo.totl file. Here are some of the basic configuration options for this site. I have other theme-specific configurations that I’ve excluded.
 1baseURL = "https://www.dividendrise.com/"
 2title = "Dividend Rise"
 3theme = "github.com/chipzoller/hugo-clarity"
 4languageCode = "en"
 5
 6paginate = 5
 7
 8# Syntax highlighting with line numbers for code blocks
 9pygmentsCodefences = true
10pygmentsUseClasses = true
11pygmentsOptions = "linenos=inline"
12
13enableRobotsTXT = true
14
15[Permalinks]
16posts = "/:title"
17
18[Taxonomies]
19tag = "tags"
20category = "categories"
Creating a New Post
A post is created based on an archetype, which is a metadata description for a post. The default archetype can be found under ~/blog/archetypes/default.md. My default archetype looks like this:
 1---
 2title: "{{ replace .Name "-" " " | title }}"
 3date: {{ .Date }}
 4tags: []
 5categories: []
 6featureImage: ""
 7featureImageCap: ""
 8thumbnail: ""
 9draft: true
10---
To create a new post, run:
1hugo new posts/2023/2023-07-02-my-page-title.md
This will create a file under ~/blog/content/posts/2023/ with the archetype metadata filled out. You can start writing your post using Markdown syntax.
Running the Hugo Server
Hugo comes with a web server that watches for changed files. Whenever you update local files, the changes will be reflected immediately. To run the server, run:
1cd ~/blog
2hugo server -D
It will produce the following output:
 1Start building sites ...
 2hugo v0.114.1+extended darwin/arm64 BuildDate=unknown
 3
 4
 5                   | EN
 6-------------------+-----
 7  Pages            | 33
 8  Paginator pages  |  1
 9  Non-page files   |  3
10  Static files     | 62
11  Processed images |  0
12  Aliases          | 13
13  Sitemaps         |  1
14  Cleaned          |  0
15
16Built in 41 ms
17Watching for changes in /Users/myuser/blog/{archetypes,assets,content,data,layouts,static,themes}
18Watching for config changes in /Users/myuser/blog/hugo.toml
19Environment: "development"
20Serving pages from memory
21Running in Fast Render Mode. For full rebuilds on change: hugo server --disableFastRender
22Web Server is available at http://localhost:1313/ (bind address 127.0.0.1)
23Press Ctrl+C to stop
View the site in your web browser with the following URL: http://localhost:1313/.
Visual Studio Code Setup
Open your site content in Visual Studio Code by selecting File > Open Folder from the menu.
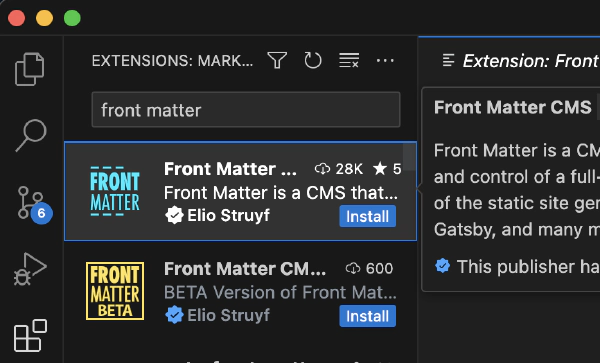
Once the files and folders are loaded, install the Front Matter extension. The Front Matter extension eliminates many of the manual commands you run. It lets you start and stop the web server from Visual Studio Code. It also lets you create new posts.
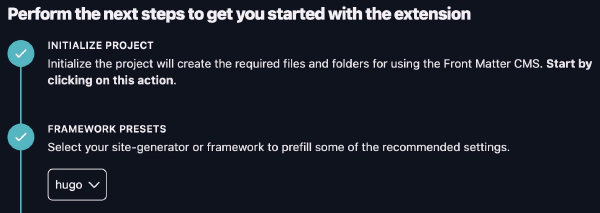
Next, select the Front Matter extension and initialize the project. On the Front Matter dashboard, click on Initialize project and select Hugo from the Framework Presets.
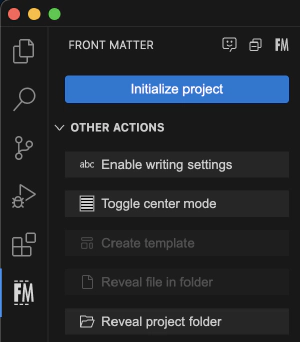
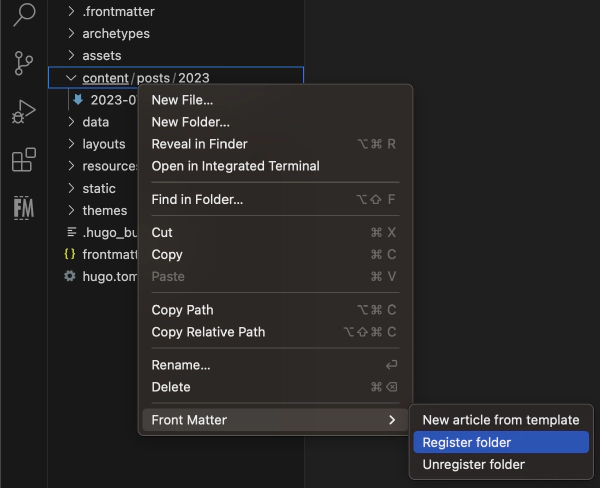
In the file listing, right-click on content and select Front Matter > Register folder.
Pushing to GitHub
The git CLI recognizes all files as candidates to add and push when changes are made. You can tell the CLI which files to ignore by adding a ~/blog/.gitignore file. This file is important because there are files that are either added by Mac OS or are updated regularly but are not required as part of the build and deployment process. We don’t want to push these files when the file content changes. This is what my file looks like:
1.DS_Store
2.frontmatter
3.hugo_build.lock
4.vscode
5frontmatter.json
6/public
7/resources/_gen
Once you’re ready to publish your site content to Github, make sure that the post metadata indicates that the post is not a draft:
1---
2draft: false
3---
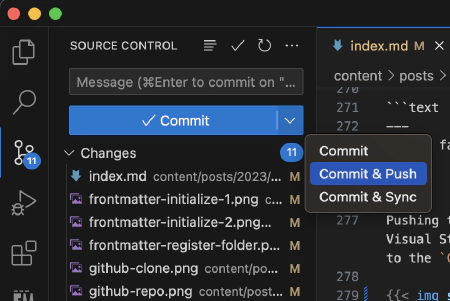
Pushing to GitHub requires 3 different commands: adding files, committing files, and pushing commits. You can do all of these in Visual Studio Code by clicking the Source Control icon and entering a commit message like Add new post. Select the dropdown next to the Commit button and choose Commit & Push.
The other option is to use the git CLI:
1cd ~/blog
2git add .
3git commit -m "Add new post"
4git push
Cloudflare Pages Integration
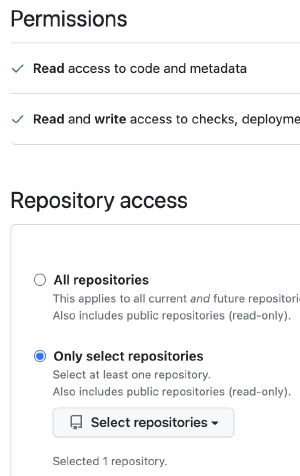
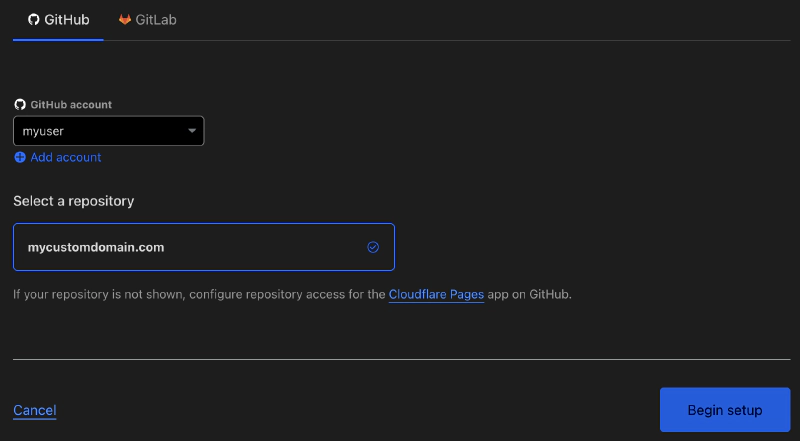
Create a Cloudflare account. The signup process is simple. In the Cloudflare Dashboard, select Workers & Pages on the left side panel, then click the Create application button. Select the Pages tab and click on the Connect to Git button. When adding your Github account, select the private repository containing your site content and click Save. Once you’re redirected back to Cloudflare, select your Github account and repository and click the Begin setup button.
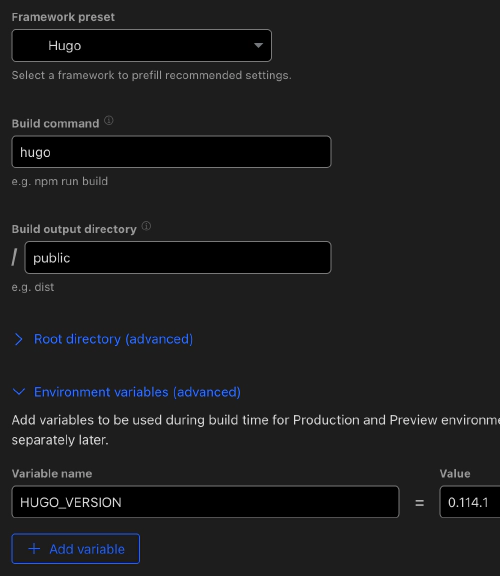
On the next page, give your project a name. A good name is the domain of your website, like mycustomdomain.com. Select the branch, which for a new GitHub repository is main. For Framework preset, select Hugo. Select Environment variables and click on the Add variable button. Add the variable HUGO_VERSION with the value 0.114.1. Then click the Save and Deploy button. You can see your local version of Hugo by running the following in the terminal:
1hugo version
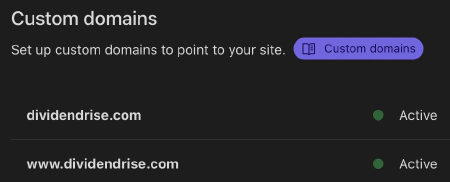
From the Cloudflare Pages dashboard, you can assign your site a custom domain. Select the Custom domains tab and click the Setup a custom domain button. This step is optional because each Cloudflare Page comes with its own subdomain: <yoursite>.pages.dev. If you don’t register a custom domain, then this entire setup is completely cost-free.
Putting It All Together
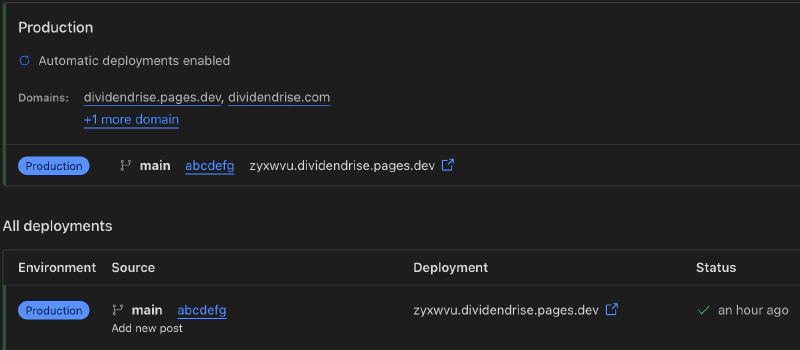
Now that Cloudflare Pages integration is complete, whenever you push new content to Github, Cloudflare will automatically build and deploy new content to your site. It generally takes less than a minute for the site to update. If there are problems with the content, you can log into the Cloudflare Pages dashboard and roll back to a previous version with a few button clicks.
I was able to quickly set up this Hugo site in a few hours. Most of that time was spent trying to figure out how to integrate Plotly for interactive graphs. For a simpler site, creating a new Hugo site and integrating it with Cloudflare Pages could take as little as an hour or two.
The only cost that I incurred was the cost of registering a custom domain. If you’re satisfied with the subdomain that Cloudflare Pages provides, then launching your site using Hugo and Cloudflare Pages is completely free.