Cloudflare R2: Low-Cost Image Hosting

When building a static website, often web developers place images in a folder named static. These images are meant to be accessible on any page on the website. But what if you have post-specific images? You can place these in post-specific folders. That’s a feature that Hugo supports. You can create a page bundle. Even if you have no additional content on your post, Hugo will generate a page bundle for you. Just run hugo on the command line and take a look at the generated public folder.
But where do you store these images and how do they get served? In a traditional self-hosted web server, they’re stored and served from the same server. Using Hugo, you can store these images in our site’s GitHub repository. When integrating with Cloudflare Pages, Netlify, or some other static website hosting solution, they’re bundled together and served from the same server. This isn’t a bad solution, especially if the website is not image heavy or if the images are small.
When creating a website, we generally want to keep the content and the assets (e.g. images, Javascript, etc.) separate. Since the assets don’t change, they’re highly cacheable, and on a high-traffic website, the assets are cached using a content distribution network (CDN). For a small-potatoes personal blog like this one, it doesn’t matter.
One of the benefits of storing the images elsewhere is the impact on the build and deployment times. When running the Hugo build, Cloudflare and other hosting solutions first clone the GitHub repository locally, run a build, and deploy the artifacts to the web server. If the GitHub repository is image heavy, it affects each part of the build and deployment process. To keep my build times low, I decided to host my website assets elsewhere.
Image Hosting on Amazon Web Services
When considering image hosting, the obvious choice is AWS S3 with AWS CloudFront. CloudFront is a CDN offered by Amazon AWS and it’s easy to integrate with AWS S3. Heck, even my employer uses this setup. On the AWS Free Tier, AWS CloudFront offers:
- 1 TB of data transfer out per month
- 10M HTTP/S requests per month
- 2M CloudFront function invocations per month
- Free SSL certificate
On the AWS Free Tier, AWS S3 offers:
- 5GB of storage
- 20K GET requests per month
- 2K PUT/COPY/POST/LIST requests per month
- 100GB of data transfer out per month
With a small personal website like this one, I think that I can stay within the AWS Free Tier. What concerns me the most is the limited number of GET requests per month.
Image Hosting on Cloudflare
I already have my domain name registered with Cloudflare and use Cloudflare Pages, so I looked into the product offerings that Cloudflare provides. Cloudflare offers a product called Cloudflare R2, which is an object store similar to AWS S3. In fact, it is API-compatible with AWS S3. That means that the tools that we use to interact with S3, like the AWS CLI, can be used to interact with R2.
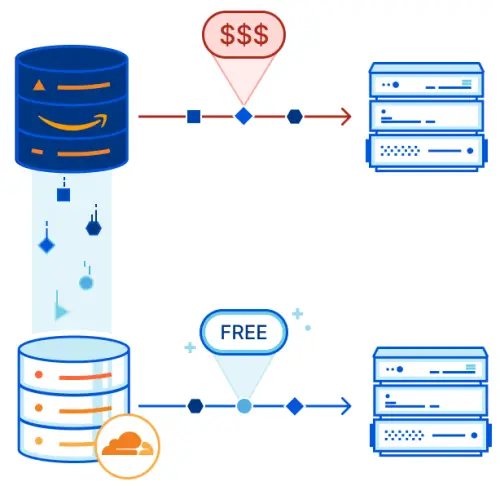
The biggest selling point for Cloudflare R2 is zero-fee egress. What that means is that there are no data transfer out fees. You’re only paying for storage and API requests, though they also have a free tier. Cloudflare is part of a Bandwidth Alliance that aims to reduce or eliminate data transfer fees between partners. This is a huge knock against AWS, which is known for charging for data transfer.
The free tier for Cloudflare R2 offers:
- 10GB of storage
- 10M Class B requests per month
- 1M class A requests per month
You can think of Class B requests as simple operations like GET and Class A requests as more complicated operations like PUT/LIST. All DELETE requests are free on both AWS S3 and Cloudflare R2.
It was easy to set up as well. All I needed to do was to create a new R2 bucket through the Cloudflare Dashboard, create API credentials, and then start uploading images. R2 buckets are private by default. To use R2 as an image host for your website, you need to expose the contents of the R2 bucket publicly. You can expose it through an r2.dev subdomain that Cloudflare provides for you. However, it is only to be used for testing because requests to the r2.dev subdomain are throttled and objects are not cached. The other option is to connect the R2 bucket to your custom domain or subdomain.
Creating an R2 Bucket
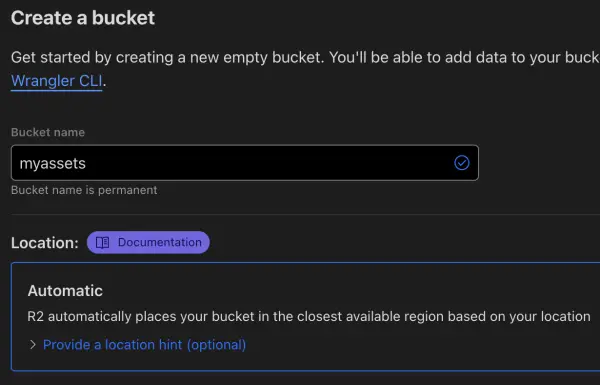
After creating a free Cloudflare account, if you don’t already have one, is to sign up for R2. Although R2 offers a free tier, you will have to pay if you go over the limits of the free tier. After agreeing to sign up for R2, you can create an R2 bucket by clicking on R2 on the Cloudflare Dashboard and then clicking the Create bucket button. You have to choose a bucket name. Like with AWS S3, Cloudflare R2 bucket names are globally unique. Once Cloudflare confirms that the bucket name is available, click the Create bucket button. Congratulations, you have your first R2 bucket.
Uploading an Image
We will use the AWS command line interface (CLI) to upload images to R2. We will use Homebrew to install the AWS CLI. If you don’t have Homebrew on your Mac, you can follow the instructions in a previous post.
Install the AWS CLI:
1brew install awscli
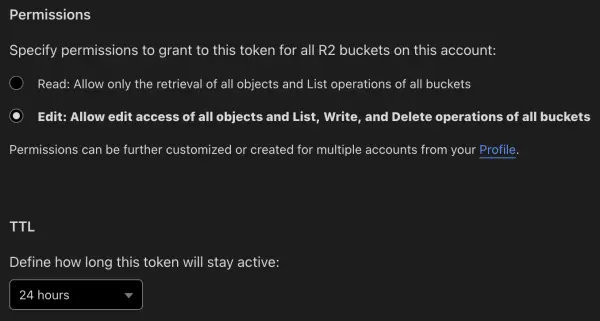
Next, you need to create an API token. On the Cloudflare Dashboard, click on R2. On the far right, click on the Manage R2 API Tokens link. Click on the Create API token button. Grant edit permissions and select a 24-hour TTL (time-to-live, aka expiration date). Note that the 24-hour TTL does not mean expires in 24 hours. It actually means the token will expire at midnight in the UTC timezone. Click the Create API Token button.
Configure the AWS CLI while the Access Key ID and Secret Access Key are displayed because you won’t be able to retrieve them later. Though you can always delete the token and create a new one at any time.
1aws configure
2
3> AWS Access Key ID [None]: <access-key-id>
4> AWS Secret Access Key [None]: <access-key-secret>
5> Default region name [None]: auto
6> Default output format [None]: json
Take note of the account ID right above the Manage R2 API Tokens link on the R2 dashboard.
To upload a file to R2:
1aws s3 cp <filename> s3://<bucket>/<path> --endpoint-url https://<account-id>.r2.cloudflarestorage.com
For example:
1aws s3 cp myfile.webp s3://myassets/assets/myfile.webp --endpoint-url https://a1b2c3d4.r2.cloudflarestorage.com
Accessing Images
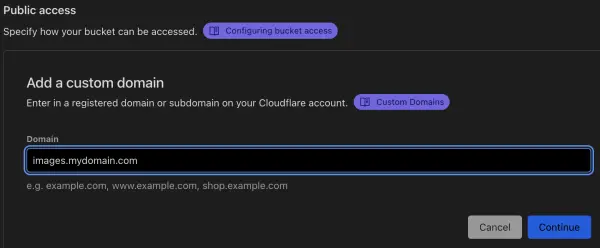
To access images, you need to connect a custom domain or subdomain. In the Cloudflare Dashboard, click on R2, click on the R2 bucket name, then click on the Settings tab. Under Public access > Custom Domains, click on the Connect Domain button. Enter a custom subdomain, like images.mydomain.com where mydomain.com is replaced with your actual domain name. Click the Continue button. You will be shown a CNAME for the subdomain pointing to your R2 bucket name. Click on the Connect domain button to finish the setup process.
It will take a few minutes for the status to change to Active. If it takes longer, click on the ellipsis and select Retry connection. Once the status changes to active, you can view the uploaded image in your browser. For the example above, the image URL would be:
1https://images.mydomain.com/assets/myfile.webp
Add a Cross-Origin Resource Sharing (CORS) policy. It prevents the browser from retrieving objects in your domain from another domain. Said another way, it prevents someone from showing images hosted on your image server from their website. From the same Settings table, go down to CORS Policy and click the Add CORS Policy button. Add any domains and subdomains that should be able to request images. The Cloudflare documentation on AllowedOrigins is incorrect. How do I know this? I uploaded my Plotly data to the R2 bucket and broke the graph display on my site. Additionally, my CORS policy now looks more like the CORS policy that I set up for AWS S3 buckets. Here is what my Cloudflare R2 CORS policy looks like:
 1[
 2  {
 3    "AllowedOrigins": [
 4      "http://localhost:1313",
 5      "https://www.dividendrise.com",
 6      "https://dividendrise.com"
 7    ],
 8    "AllowedMethods": [
 9      "GET"
10    ]
11  }
12]
Updating Image References
This was the hardest part. The hugo-clarity theme that I use doesn’t allow you to show remote images. Instead, when you build the site with hugo, it downloads the image. I had to read through the code to identify which partials files to override and modify.
I also wrote my own Hugo shortcode to display remote images. I added a config for the asset base URL. In hugo.toml, I added:
1[Params]
2assetBaseUrl = "https://images.mydomain.com/assets"
I added layouts/shortcodes/asset.html:
1{{- $alt := .Get "alt" }}
2{{- $file := printf "%s/%s" .Site.Params.assetBaseUrl (.Get "src") }}
3<figure>
4  <picture>
5    <img loading="lazy" decoding="async" alt="{{ $alt }}" src="{{ $file }}" />
6    <figcaption class="img_alt">{{ $alt }}</figcaption>
7  </picture>
8</figure>
On my posts, I can display a remote image like:
1{{< asset src="zero-fee-egress.webp" alt="Zero-fee egress" >}}